This guide is a companion to the Getting Started walkthrough built into AuthRocket. It’s the perfect place to start. By the end, you will have created a Realm and configured LoginRocket, and will be ready to add the small bit of code necessary to integrate your app with AuthRocket.
If you’re already that far, you can skip to the Integration Guide.
When you create a new account, you will be automatically sent to the Getting Started page. If you’re not there now, go to Support -> Get Started. (If on the account dashboard, select your account first.)
Our goal for getting started is to enable you to successfully authenticate a test user. We will walk through setting up a Realm, LoginRocket, and your app. Don’t worry about getting anything wrong. Everything’s easy to correct or redo later.
On the Getting Started page, you should see a pre-filled form to help create your first realm. Customize the settings if desired, then click Create.

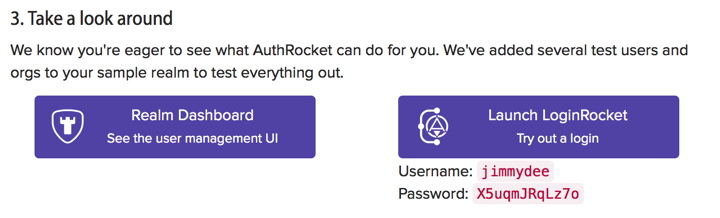
At this point you now have a realm, pre-populated with several test users and orgs, and functioning, fully-hosted login and signup pages (via LoginRocket). The test users have been assigned a random password which will be shown on the page. Be sure to save a copy of this password.
Take a minute to look around. We’ve provided button to easily view the user management UI and to try out a login (and signup, if enabled).
Login and signup pages can be extensively customized to match your app.
If you want to setup social authentication at this time, check out the Social Login Guide and add one or more social providers. Just like password-based logins, you can test social logins in realtime using your LoginRocket login page.
If you want to move on and come back to this later, feel free. Social logins require no extra code, so they can be added at any time.
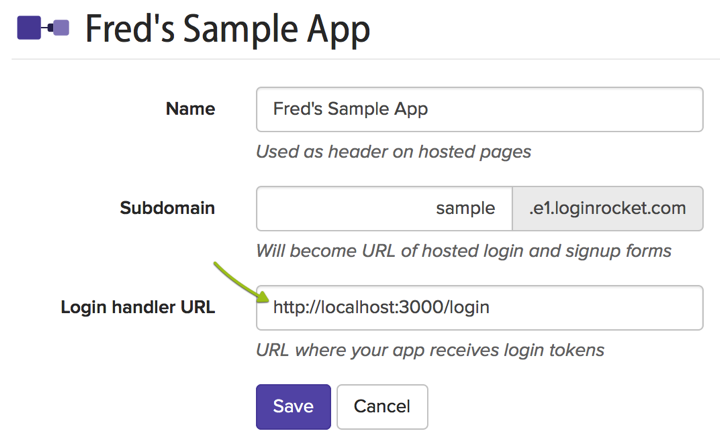
We automatically pointed your LoginRocket Connected App URL to a test app that we created. This allowed you to fully test logins and signups above.
Now it’s time to repoint that URL to your app and enable your app to process logins.
If you already have an app (even if it’s just on your laptop), go ahead and set the app URL.

Change the Login Handler URL to point to your app. Using localhost while in development is perfectly valid.
Next, click Get API key, keep that page ready, and head to the Integration Guide.
Questions? Find a Typo? Get in touch.