Connecting Google to AuthRocket allows your users to login to your app using their Google account. It’ll take just a few minutes in your browser, and takes no coding at all.
This guide assumes you’re using LoginRocket (our hosted login pages).
If you’re not using LoginRocket, you may want to at least start with it so you’ll know everything is working. Then, go back and adjust for either authrocket.js (see details on Social Logins) or self-hosted logins.
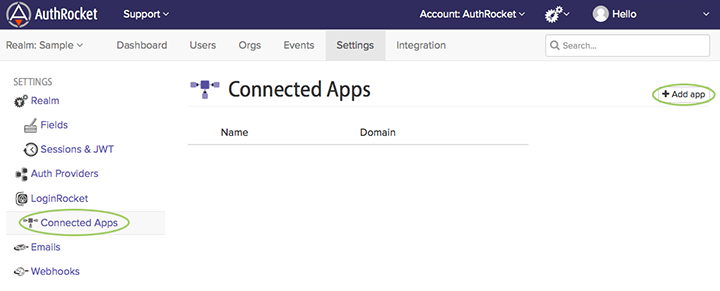
If you already have at least one Connected App, you can skip to the next step.
Otherwise, create a Connected App. Start by clicking on Connected Apps. Then click Add App.
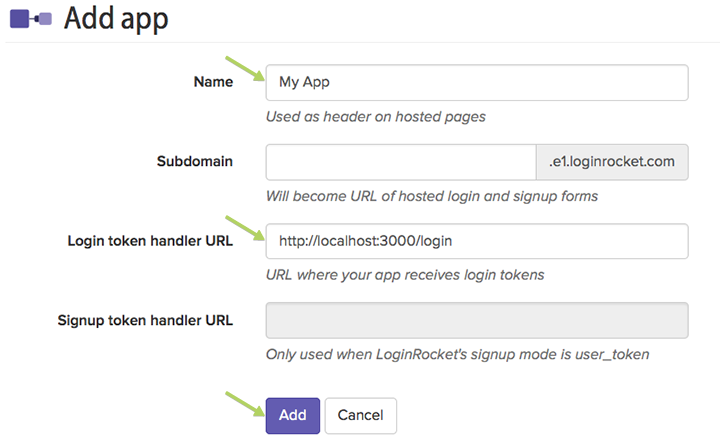
The name field will become the header on the login page. You probably want to use the name of your app.
For subdomain, you may either leave it blank (which will cause it to be auto-generated) or use some variant of your app’s name. If unsure, just leave it blank.
Also add the login handler URL.
Our example here shows http://localhost:3000/login. You should adjust these to fit your development environment. In production, you’ll use a production URL.
As you probably noticed, we included /login in our example. Feel free to adjust this to fit your app or framework. These can easily be changed later if necessary, so won’t worry if you’re not yet sure what to use.
Next, click on Auth Providers and then on the Add button next to Google.

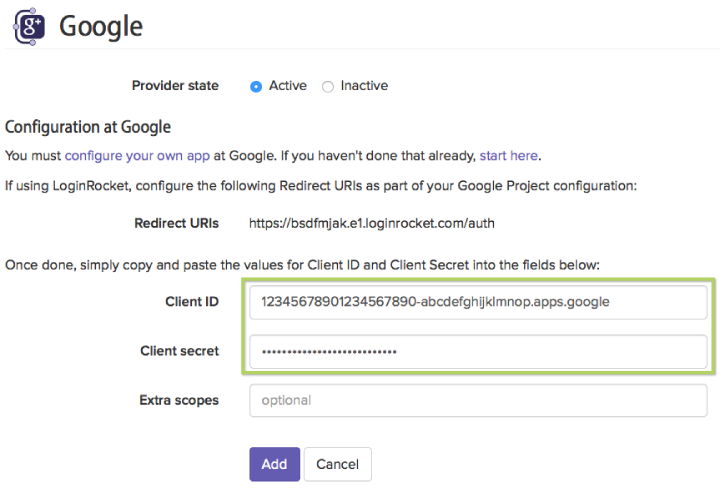
Leave this here. Next we’re going to tell Google about your app and we’ll need to add the Redirect URIs from this page into the Google Project configuration. We’ll come back to this page to fill in the rest of the fields in a moment.
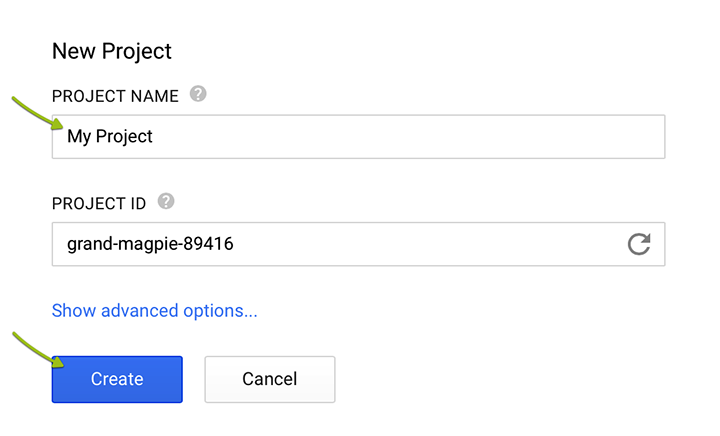
Open another browser tab to Google’s project configuration and login.
If you’re already using one of Google’s developer services, you may already have a project. If not (which is most likely), click on Create Project.
Give the project a name (probably your app’s name), agree to the terms if required, and click Create.
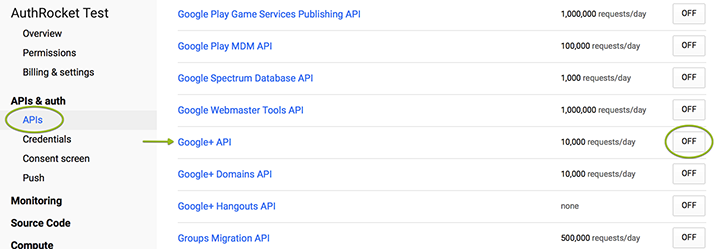
Next, whether you just created a new project or are using an existing one, click on APIs & auth, then APIs, and then scroll down to find Google+ API. When you find it, click on Off to toggle it to On.
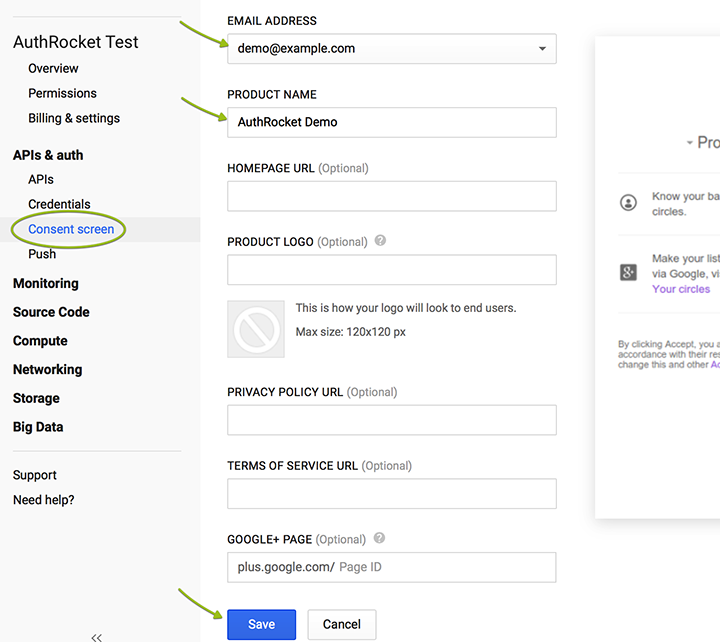
Now click on Consent screen. Select an email address, add your app’s name to Product Name, and click Save.
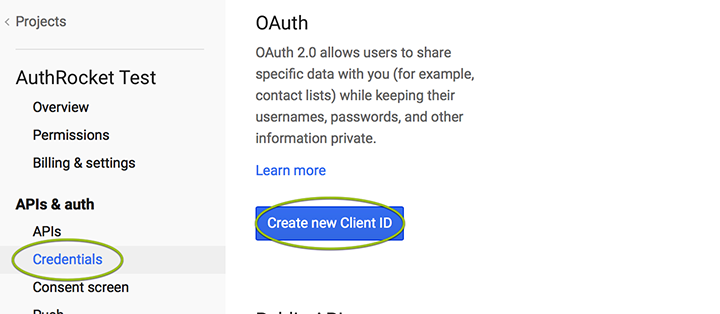
Next, click on Credentials, then Create new Client ID.
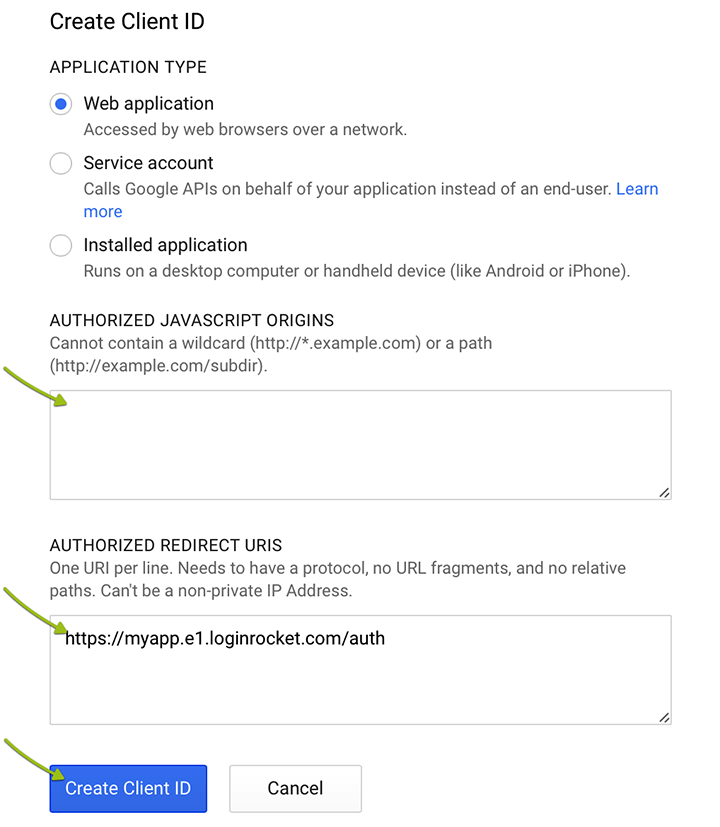
Leave Application Type set to Web application. Delete the Javascript Origins.
Copy and paste the Redirect URI from AuthRocket (where we ended at step 2) into the Authorized Redirect URIs field. (If you have more than one Redirect URI in AuthRocket, add them all). Finally, click Create Client ID.
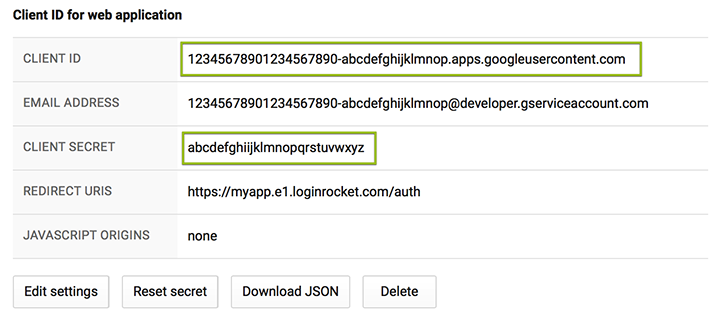
Now copy and paste the Client ID and Client Secret from Google into their matching fields back in AuthRocket (same page where we left off). Click Add.
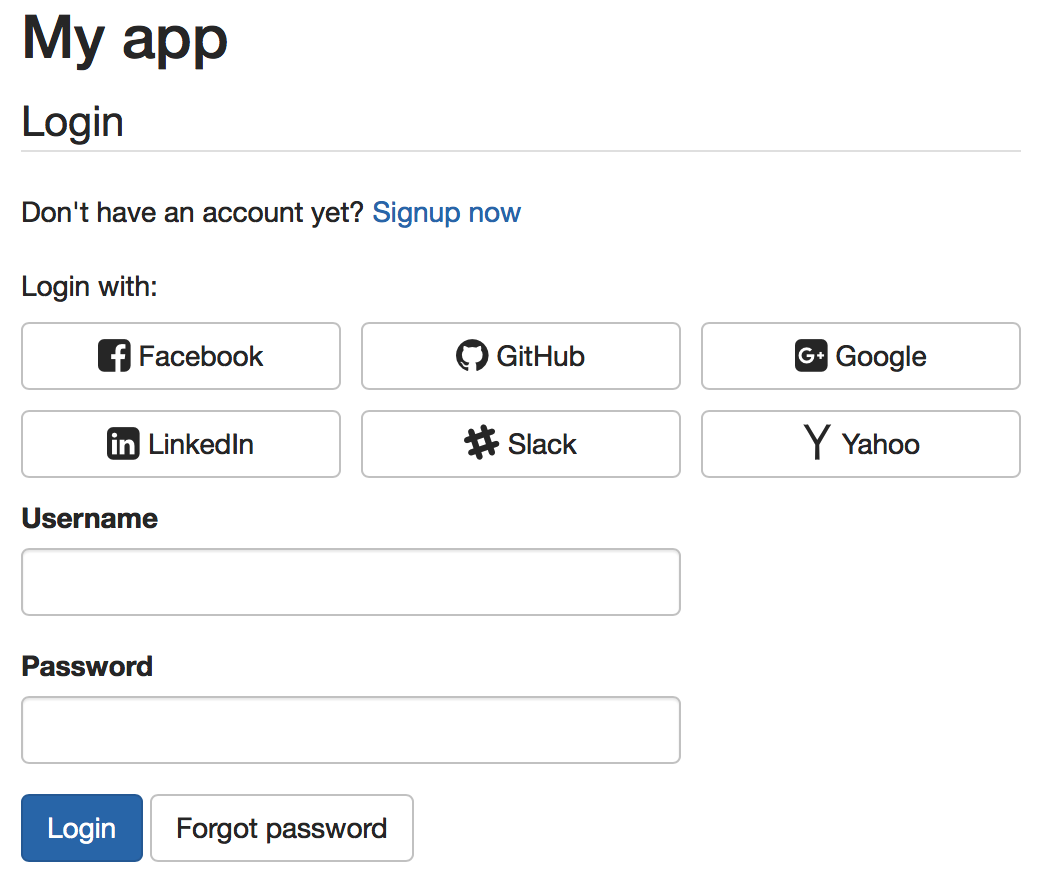
That’s it. Go to your LoginRocket page and you should see Login with Google. Click it, login to Google, and allow the login. If your app already accepts logins, you should be logged in. Even if not, you should see the user under Users in AuthRocket.
Before you go into production, you may want to upload your app’s logo to Google (under Consent Screen) so Google can display it on the login authorization page.
Congratulations, you’re done adding Google logins to your app!
Questions? Find a Typo? Get in touch.