This guide is an alternative to the Quickstart Guide. Instead of using the Get Started wizard, it will walk you through performing all the same steps manually.
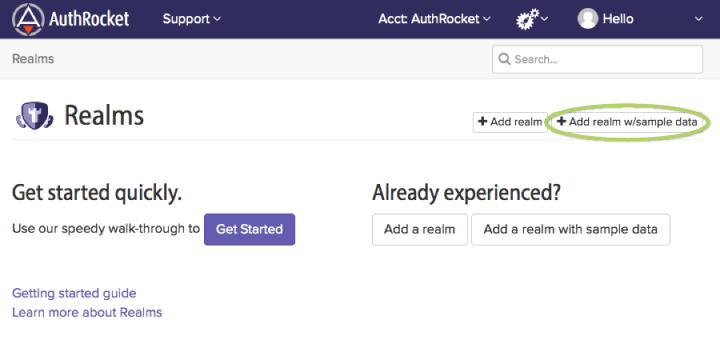
Start by creating a realm. Realms are simply containers for users and orgs.
AuthRocket has a built-in feature for creating realms that are pre-populated with sample data. We’ll use that feature now so we have users to test with when logging in.
Start at the page titled Realms. If you’re not there, just click on the Realms menu and select All Realms.
Then, click on Add Realm w/Sample Data.
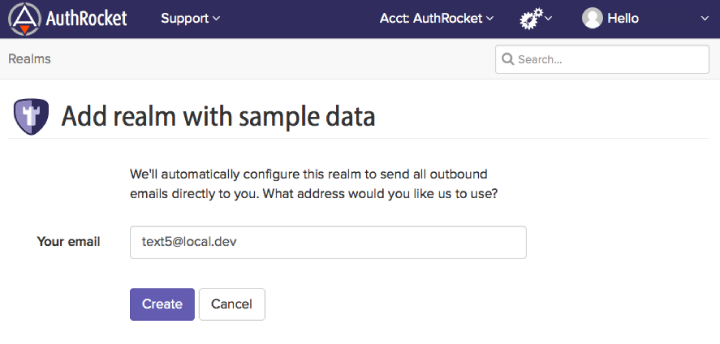
On the following page, click on Create.
After a few seconds, you should have a new realm created and ready to go. Be sure to take note of the password since it’ll only be shown once.
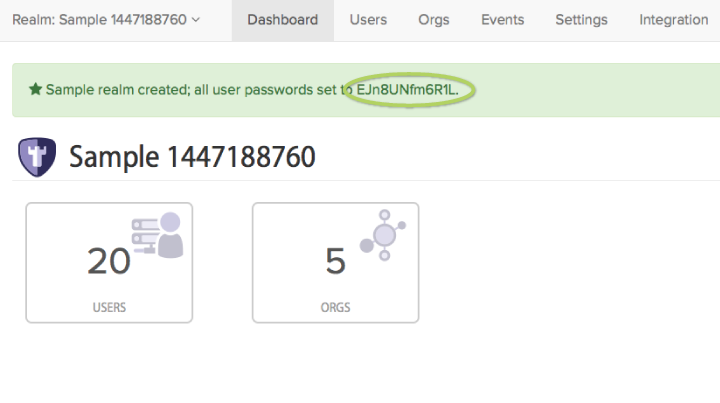
By default, your new realm will already have LoginRocket configured with logins enabled (and signups disabled). If you want to enable signups now, go to Settings -> LoginRocket and enable hosted signups.

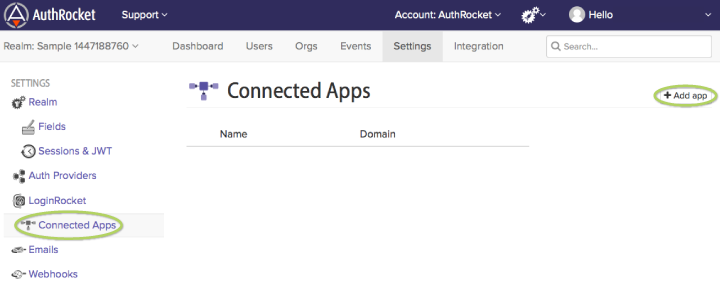
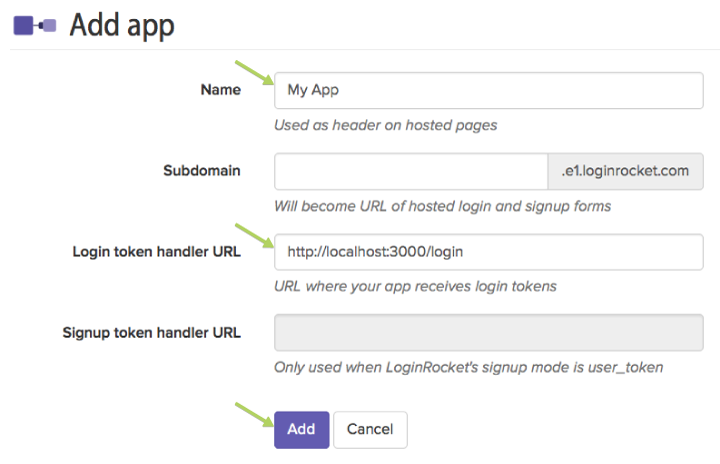
The next step is to create a Connected App. This will tell AuthRocket about your app so it knows how to handoff the login to you. Start by clicking on Connected Apps. Then click Add App.
The name field will become the header on the login page. You probably want to use the name of your app.
For subdomain, you may either leave it blank (which will cause it to be auto-generated) or use some variant of your app’s name. Since this is a sample realm, we suggest leaving it blank.
Also add the login handler URL.
Our example here shows http://localhost:3000/login. You should adjust this to fit your development environment. In production, you’ll use a production URL.
As you probably noticed, we included /login in our example. In our discussion below, we assume that you’ll be verifying inbound logins at that location. Feel free to adjust this to fit your app or framework.
All these settings can easily be changed later, so just make your best guess if you’re unsure.
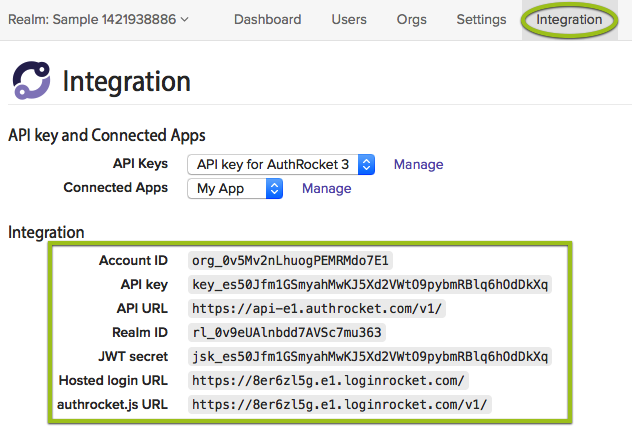
Within your realm, click on Integration at the top. This will display your Secret API key and related parameters.
You probably only have one API key and one Connected App right now, so everything is ready to use. If you have more than one, you can select which ones to show the proper key and/or URLs for.
Next, keeping this page open for reference, head to the Integration Guide to setup your app to receive logins from AuthRocket.
Questions? Find a Typo? Get in touch.